Neural networks work on the principle of “think of a query, enter it and get an answer”. But it’s not that simple: if you write an abstract question or overload it with details, the neural network will get confused and give a mushy answer.
I will tell you how to specify queries correctly and get correct answers in this article. If you don’t have time to read and you need to work with AI now, go straight to the end of the article. There I have collected sites with ready-made queries that can be copied into the neural network and immediately get a correct answer.
How to set a query for generating images
Let’s study the generation of pictures using the example of the popular Midjourney service – it has more possibilities. We talked about other similar platforms in our article about what will happen to neural networks and content in the future.
Here’s a short list of communication rules that Midjourney’s creators suggested:
- Spell out the most precise and understandable query possible. Avoid abstractions. If you want to generate a specific place, it’s better to write its name instead of “a famous statue in New York”.
- Do not use the particles “not”, “except”, “without” and similar ones. For example, instead of “a person is not happy” write “a person is sad”.
- Split complex queries into parts using commas or double colons “: : :”. For example, this is how to separate object requests from style and AI commands.
- Request single objects or specify specific numbers.
While I was preparing the material, in one of the articles I came across the opinion that archetypes should be used to generate pictures. Especially if you can’t generate the necessary object or pose. For example, instead of describing “a man with a bow and arrows behind his back” it is better to write “archer”, instead of “a man in a robe with a stethoscope and documents” – “doctor”.
If you don’t get it that way, you should look for examples of the necessary pictures on the Internet, for example, on Pinterest or on photo banks. And take their descriptions from these pictures. This way it will be easier for the neural network to understand the idea, because it is on such pictures with descriptions that they were trained to generate images.
- Define the object
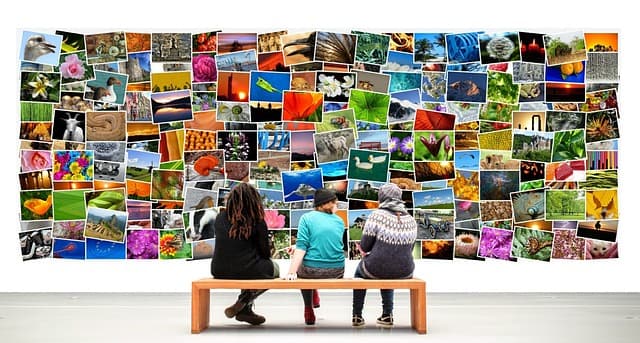
We start with what we want to see on the future picture. For example, a dog, a letter, an airplane or magicians. Neural network will have variants of images for any taste, because they are trained on a huge database from the Internet.
If you want to specify several objects, separate them with two colons “:::”. This way the neural network will not get confused and will draw exactly what you want.
Uniqueness and diversity of the final pictures will turn out in the case if you combine several objects in one photo. For example, a cat-superhero or a man-bitcoin.
In addition, objects can be personified or set them texture. For example, let’s create Masha and Bear if they were the presidents of the United States.
Another option is to draw objects as if they were famous characters. For example, Cheburashka if he were the Terminator, or Shurik if he were the Bunny from “Well, Wait!”
If you want the objects in the picture to be more than one, say so in the request. For example, not several parrots, but three parrots. But keep in mind that the more objects the neural network needs to generate, the more detail will suffer.
The main thing is that the queries should be clear and specific. For example, at the request “the wind is blowing” the neural network will draw something abstract.
But at the request “Hurricane, the wind is blowing in the field and bending a tree”, the force of nature can be felt.
In addition to real objects, neural networks can generate abstractions. For example, the future, time or love. But it is unlikely to get high-quality images on such topics – the neural network will get confused and draw something inarticulate. Instead, it is better to replace abstractions with objects. For example, not just love, but the embrace of young people with a gentle background.
- Add details
Details are needed to complete the picture and make it clearer. If you don’t specify any details, the neural network will make them up on its own, and sometimes they will be out of place.
You can add details to an image using nouns, verbs, and adjectives. Nouns are needed to specify the object itself and its surroundings. For example, a car in a parking lot.
Verbs will help to show actions. It is better to use specific verbs: instead of “waiting” – “standing and waiting”, instead of “upset” – “crying” or “upset, holding his hands to his face”.
And adjectives are needed to bring the picture to life and add context to it. For example, the adjective “realistic” make the picture come closer to reality. And “old” can make a picture look retro.
Let’s make a query for an example: “There is an old wooden house in the field. Next to it stands one large tree, one bench. On the bench sits an elderly man. Sunset.”
The main thing is not to go overboard with the length of the description. In Midjourney you can write up to 4000 characters, in DALL-E 2 – up to 400 characters, in Stable Diffusion – up to 75 words.
- Setting the style
In neural network databases there are hundreds of images with corporate styles of any artists or genres. Therefore, you can generate images in the style of Van Gogh, in the genre of noir or combine all of them and get a picture in the style of Marc Chagall in the genre of cyberpunk. For example, let’s make a query “Eiffel Tower in noir style, as if it was painted by Van Gogh”.
How to make a moodboard
In addition to genres, you can change the style by using different lighting, the format of the final picture, camera and lens settings.
Lighting features. The same story can be made different in mood and emotion depending on the color scheme. For example, more gloomy and sad, or bright and cheerful.
Format of the final image. You can ask the neural network to make the finished image in the form of a painting, art, photo, sculpture, etc.
Different camera and lens parameters. With the help of special commands you can set camera or lens parameters. This will affect the final image. For example, you can get a realistic photo if you ask the neural network to generate a photo taken with a 9 mm lens. Or you can add a fish eye effect.
If you don’t know how to set the style, add URLs of your favorite images before the request text. The neural network will be guided by them during generation.
- Set image parameters
By default, images are generated in 1:1 aspect ratio. But you can change the size and make the image in different formats. To do this, you need to write the commands:
- --w – Image width. Works better if the number is a multiple of 64.
- --h – Image height. Works better if the number is a multiple of 64.
- --ar – Desired aspect ratio instead of manually adjusting the height and width with --h and --w.
- For example, --ar 16:9 to enable a 16:9 aspect ratio.
- If you want to specify a custom image size, use the --w X --h Y command
Important: You won’t be able to customize any aspect ratio you want. You can only select the standard resolution numbers.
You can also specify the output resolution using keywords like 8K, 4K, photoreal, ultra photoreal, ultra detail, intricate detail, etc.
You can also specify the output resolution using keywords like 8K, 4K, photoreal, ultra photoreal, ultra detail, intricate detail, etc.
List of the most popular commands for working with Midjourney
Commands should be added at the end of the request, it is better to put a colon with a space ( : : ) before it – this way the neural network will understand exactly what command you are giving it. Now to the commands.
- --q . Sets the degree of image elaboration. Here you can use a range from 0.25 to 5. The base value is 1, and at 5 the neural network will work through each picture for 5 minutes.
- --s . Indicates how much to stylize the image. Values can be specified from 600 to 20,000. The default value is 2500. For example, if you specify Van Gogh-style stylization, the higher the number, the more the image will resemble the artist’s work.
- --chaos . Adds a level of abstraction. Takes values from 0 to 100. The higher the number, the stronger the level of abstraction.
- :: . Assigns a weight to some part of the image relative to the text. The default value is 0.25. If for the query “email dog” we assign the values email::5 dog:3, then the weight of the word email will be higher and it will be prioritized during generation.
- --iw . Specifies the level of similarity of images. For example, if you give the neural network an example picture and want to make something similar – add this command and the desired degree of similarity. The default value is 0.25.
- --no. Sifts out specified words from the query. Helps you remove elements you don’t like from the image. For example, -no birds will remove birds from the image.
- -- -video. Saves the video of the generation progress. To save a video, you must react with the ✉ envelope to a message from the neural network. You will then receive a link to the video in private correspondence with the bot.
There are other commands:
- /settings – opens a field with simplified settings for generation, quality, privacy, etc.
- /prefer option set – allows you to create a personal template for future generations. For example “/prefer option set mine --ar 4:3” will create a --mine setup with the option in a 4 by 3 aspect ratio. This is handy because instead of specifying dozens of commands, you can get by with just one.
- /prefer option list – shows saved templates. You can save no more than 20 personal options.
And you can work with another popular and powerful neural network – Stable Diffusion – through Fabula AI. The interface has prompts to create a prompt, style selection, and additional parameters (steps, guidance scale, seed).